


Isometric Tiles and Pathfinding with Corona


I previously wrote a tutorial on how to create a square grid and implement pathfinding with Corona SDK and the Jumper library, but now we’re going to take things up a notch and do the same thing on an isometric grid. Isometric grids use rhombus, or diamond shaped tiles, as opposed to square tiles. The introduction of angled tiles adds the perception of depth and can dramatically change the visuals of your game without adding much complexity to your code.
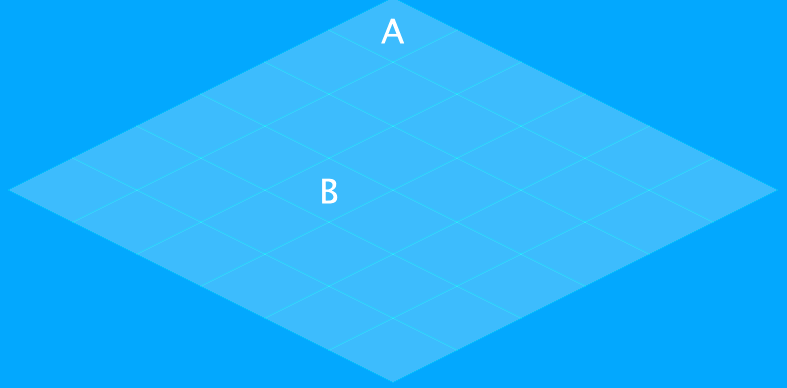
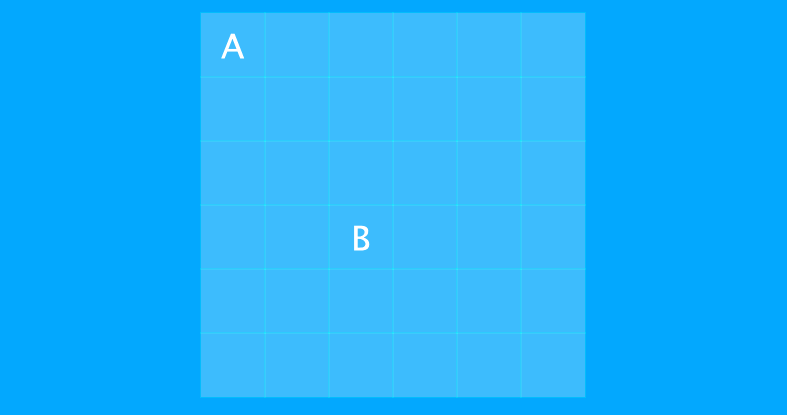
For a comparison, here is what a simple map looks like in isometric (2.5D) vs orthographic (flat) projection.
And to get a greater feel for the difference between the projection techniques, [take a look at my current game’s status](), where I add a little artwork to the equation.
But enough talk for now, let’s get to the nuts and bolts of how to make the switch. You’ll first want to download and install Jumper, the open source pathfinding library used for this project. Once you have that downloaded, lets’s do some basic setup by declaring local variables and drawing a background to the screen.
https://gist.github.com/codepaladin/8dc3511c2c5b6b4044ad
Once the basics are set up, we’ll draw a grid to the screen and populate the map table with information about the grid.
https://gist.github.com/codepaladin/04e7c8ed2fa73fcb8a65
This function is responsible for a couple things. The first is to 6 rows and 6 columns in order to give us our grid. Since the isometric look depends on the tiles being diamond shaped, we create 36 polygons, each with a width of 128 pixels and a height of 64 pixels. It’s important to note that compared to a square grid, a little extra math needs to be performed when calculating grid and pixel coordinates. This is because moving an x or y position on the cartesian grid also affects both the x and y pixel coordinates. I don’t want to get into that too much in this tutorial, but I recommend reading Isometric Tiles Math if you want to learn more about the mathematics behind plotting isometric tiles.
The second responsibility of the drawGrid() function is to populate the local map {} table with 1 and 0 values. When the function is finished running, the map table will contain 6 nested tables, with each nested table consisting of 6 values. The map is a direct representation of the grid drawn to the screen and this table is what Jumper needs in order to know how many rows and columns make up the grid and which positions are walkable or un-walkable.
Next, we create our start and end positions:
https://gist.github.com/codepaladin/4035d4415e2f1cec82b5
These two functions draw the A and B values onto the screen by using the start and end coordinates declared earlier. These points are also what the Jumper library will use to create the most efficient path.
https://gist.github.com/codepaladin/d85a5d7f9f0244b774fd
The Jumper library utilizes the map, obstacle, and start and finish variables to figure out the optimal grid path to get way to get form point A to point B. To take things further, you could store the grid path and then use it to move a sprite from A to B one grid position at a time. Doing that would require a little more work to do things like translate grid coordinates to pixel coordinates, and I recommend the Pathfinding with Jumper tutorial if you need some more help.
The source code to this tutorial can be found on GitHub.

Thank you
Your comment will be published once it has been approved.
to see the pull request you generated.